The Ultimate DIY First Aid Kit for Backpackers
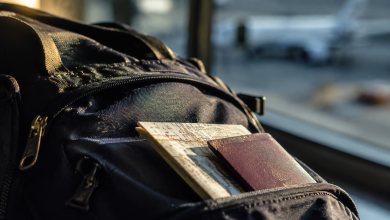
There’s a specific kind of dread that settles in when you’re three miles from the nearest trailhead and someone twists an ankle on loose shale. You reach for your pack. And what you pull out in that moment or fail to pull out determines everything that follows. Most backpackers think about their first aid kit once: the day they buy a pre-packaged one at REI and toss it in the bottom of their gear bag. That kit sits there, unopened, slowly expiring, full of items they’ve never used and missing the ones they actually need.
Building your own changes the equation entirely. It forces you to think through scenarios before they happen, understand what each item does, and calibrate weight against risk in a way that no off-the-shelf product can do for you. This isn’t minimalism for its own sake. It’s intentional preparation.
Why Pre-Packaged Kits Almost Always Fall Short
Walk into any outdoor retailer and look at the standard kits. You’ll find a dozen adhesive bandages in sizes that barely cover a blister, two alcohol swabs, and a folded instruction card with font so small it’s unreadable by headlamp. They’re designed to check a box, not to function in the field.
The real problem isn’t what’s in them it’s what isn’t. Most commercial kits omit blister treatment beyond basic bandages, carry no real wound closure options beyond standard Band-Aids, and rarely include anything for allergic reactions or gastrointestinal distress, which are statistically among the most common backcountry medical events. They also carry redundancies that serve no one: three moleskin pieces when one quality sheet would do more work.
The other issue is personal calibration. Your kit needs to reflect your trip profile. A solo overnighter on a well-trafficked trail carries different risk than a twelve-day traverse in a remote wilderness area with no cell service. A group of six creates different triage demands than a solo hiker. Pre-packaged kits are averaged to the point of being useful to almost no one.
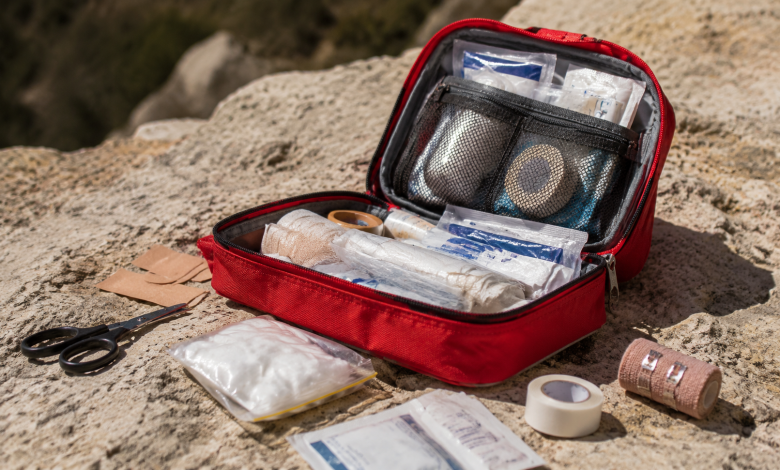
The Foundation: Wound Care Done Right
Start with what you’ll actually use most. Cuts, scrapes, blisters, and puncture wounds are the daily bread of backcountry medicine. Your wound care section should be your most thoughtfully assembled component.
A few large gauze pads (4×4 inches) are far more versatile than a stack of small ones. They can be cut down, layered, or used as-is. Pair these with a roll of medical tape actual medical tape, not the decorative kind and you can handle wounds of varying sizes without needing a separate bandage for every scenario. Add a small amount of non-adherent dressings for burns or abrasions where sticking is a problem.
Wound closure strips deserve their own mention. These are the thin adhesive strips that pull wound edges together. They work well on clean lacerations in areas that don’t flex too much. They’re not stitches, but in the backcountry, they’re often the right call for keeping a cut closed and protected while you make your way out.
Irrigation is something most hikers overlook. A wound that looks clean is often not. Trail debris, bacteria from soil, contamination from water all of it can turn a manageable cut into a serious infection over three days. A20cc syringe or even a hydration bladder bite valve with a small hole can generate enough pressure to properly flush a wound. Pack one. It weighs almost nothing.
Blister management is its own specialty. Moleskin in a full sheet gives you flexibility to cut shapes that actually fit. Some backpackers swear by Leukotape it adheres better than moleskin on sweaty skin and stays put over multiple days. The honest answer is to carry a small piece of both until you know what works for your feet.
Medications: The Items Worth the Weight
Pharmaceuticals represent the best weight-to-value ratio in any kit. A few pills weigh grams and can fundamentally change the outcome of a bad day.
Ibuprofen is the workhorse. Anti-inflammatory, analgesic, fever-reducing. It handles the swollen ankle, the headache at altitude, the low-grade fever from a mild infection. Carry more than you think you need.
Antihistamine specifically diphenhydramine belongs in every kit regardless of whether you have known allergies. Allergic reactions in the field don’t always announce themselves in advance. Bee stings, unfamiliar plants, food sensitivities that manifest differently at altitude and under exertion. Diphenhydramine covers mild to moderate reactions. If there’s any history of anaphylaxis in your group, an epinephrine auto-injector becomes non-negotiable and the whole kit reconfigures around that risk.
An antidiarrheal like loperamide sounds unglamorous but earns its place immediately the first time you need it. Gastrointestinal illness whether from contaminated water that slipped through your filter, bacteria on improperly handled food, or stress-induced gut dysfunction can derail a trip faster than almost any physical injury. Loperamide slows motility, buying you time to make decisions and get to safety without dehydrating yourself into a secondary crisis.
A broad-spectrum antibiotic is something to discuss with your doctor before a major expedition. Not every trip warrants it, but for remote travel, a prescription for something like ciprofloxacin or azithromycin gives you options in the event of a serious infection that develops far from medical care. This isn’t something to self-prescribe from the internet have the conversation before you leave.
Tools That Earn Their Weight
A pair of nitrile gloves takes up almost no space and turns any treatment into a safer interaction, both for the patient and for you. Pack two pairs minimum. Gloves also serve a dual purpose as emergency water containers in a pinch, which sounds extreme until the day it isn’t.
Tweezers with a pointed tip are essential for splinters, thorns, and tick removal. The flat-tipped variety from drugstore kits are nearly useless for fine work. A quality pointed-tip tweezer, like those made by Splinter Out or similar specialized tools, makes the difference between a clean extraction and an inflamed mess two days later.
Safety pins in two or three sizes handle improvised sling adjustments, clothing repairs, and can secure bandages when tape fails. They’re free weight, essentially. Take five.
A SAM splint the moldable aluminum-foam combination used to immobilize joints and fractures compresses flat and weighs very little. It can be shaped around an ankle, a wrist, or a finger and holds remarkably well with elastic bandage wrap. You won’t use it often. When you do, you’ll be glad it’s there.
Elastic bandage wrap (ACE bandage or similar) gives you compression for sprains, a securing layer over splints, and a base for improvised wound dressings. A four-inch width handles most applications.
The Stuff People Forget Until They Need It
A small thermometer. Fever in the backcountry is information. A temperature of 100°F is one thing;103°F at altitude, two days from the trailhead, is a different conversation entirely.
Dental wax or temporary filling material. Dental pain from a cracked tooth or lost filling is one of the most incapacitating things a backcountry traveler can experience, and it’s almost never on anyone’s planning radar. A small tube of temporary dental cement, available at any pharmacy, can quiet the pain enough to function until you can get real treatment.
A blunt-tipped scissors, sometimes called trauma shears in clinical settings, lets you cut through clothing without worsening a wound. You don’t need the full EMT-grade version a small, sharp pair with a blunt lower blade works fine and weighs almost nothing.
Emergency contact card, written in pen, in a waterproof sleeve. It sounds redundant in the era of smartphones, but phones run out of battery, crack on rocks, and get soaked in river crossings. A written card with your emergency contacts, any allergies or medications, your planned route and expected return date this information is critical if you’re incapacitated and someone else is managing your care.
Packing It All Together
The container matters more than most people acknowledge. Zip-top bags work in dry conditions but fail in sustained rain. A small roll-top dry bag or a rigid, lightly structured pouch keeps contents organized, visible, and protected. Color-coded inner pouches one for wound care, one for medications, one for tools let you find what you need without emptying the whole kit in a stressful moment.
Weigh your kit when you’re done. A well-built DIY first aid kit for a solo trip should come in between 6 and 12 ounces depending on trip length and risk profile. A group kit for five or more people might run 16to 20 ounces and still represent intelligent packing relative to the situations it prepares you for.
The real measure of a kit isn’t what it weighs. It’s whether you understand every item in it, know why it’s there, and have at least a working mental model of when and how to use it. Take a wilderness first aid course if you haven’t. Even a single-day course changes how you think in the field. The kit is only as effective as the person carrying it.