How to Break In Stiff Leather Boots Without Blisters
The Real Problem Nobody Talks About
There’s a particular kind of suffering that leather boot owners know well. You buy a pair of boots that looks exactly right the silhouette is clean, the leather is rich and full-grain, the sole is thick enough to last a decade. You take them home, put them on with optimism, and walk half a mile before the back of your heel starts to burn. By the time you’re home, you’ve got a blister the size of a quarter and a grudge against footwear in general.
Most people either push through the pain or give up and let the boots collect dust. Both approaches miss the point. Breaking in stiff leather boots isn’t about endurance it’s about chemistry, timing, and a little patience applied in the right places. The leather needs to move before your foot forces it to move. That’s the whole principle.
Understanding that distinction changes everything about how you approach the process.
Why Leather Gets Stiff in the First Place
Full-grain and top-grain leather the kinds used in quality boots are dense, tightly fibered materials. Before they’re tanned, treated, and stitched into a boot, they’re flexible in the way a living hide is flexible: uniformly, across the whole surface. Once the tanning process sets the fibers and the boot is shaped around a last, that flexibility becomes locked into a specific geometry. The boot remembers its shape. Your foot has a different shape. That mismatch is where the blisters come from.
The stiffness is actually a feature, not a defect. A leather boot that starts supple will wear out faster, lose its structure, and fail to protect your foot the way it was designed to. The rigidity you feel on day one is the same rigidity that will keep the sole from twisting and the ankle from rolling on rough ground two years from now. You just have to coax the leather through a transitional phase where it begins to conform to your specific anatomy.
Heat, moisture, and mechanical flexing are the three forces that do this work. The key is applying them deliberately rather than waiting for your own body heat and sweat to do the job the hard way.
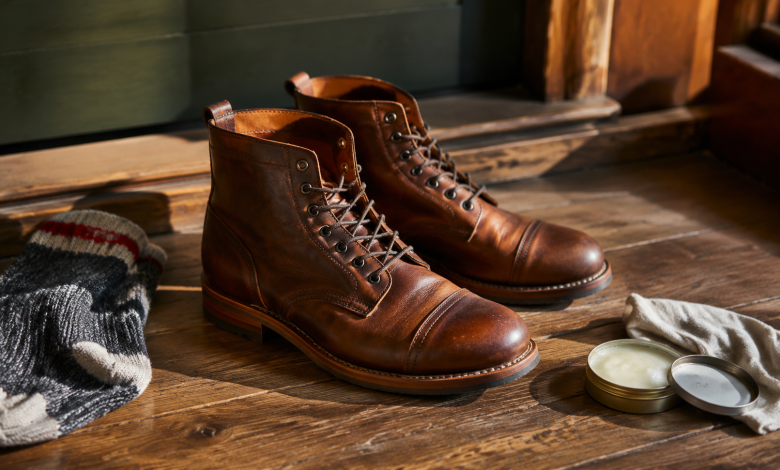
The Conditioning Step Most People Skip
Before you ever put the boots on your feet, work a leather conditioner into the entire upper. Mink oil, neatsfoot oil, and dedicated boot conditioners like Obenauf’s Heavy Duty LP all accomplish the same basic thing: they penetrate the leather fibers and restore the natural oils that the tanning process partially strips away. Softer fibers bend more easily. Fibers that bend easily conform to your foot instead of fighting it.
Apply the conditioner in small, circular motions using your fingers or a soft cloth. Don’t rush it. Work it into the tongue, around the heel counter, across the toe box, and especially along the sides where the leather will crease when you flex your foot forward. Let the conditioner absorb for a few hours overnight is better. Wipe away any excess before you put them on.
This single step shortens the break-in period significantly. Boots that might take three weeks of painful wear to soften can often reach a comfortable state in half that time if the leather is properly conditioned from the start.
The Sock Layering Method
One of the most effective and underrated techniques is simple: wear two pairs of socks, at least for your first several sessions. A thin moisture-wicking liner sock under a heavier wool or cushioned sock adds padding exactly where the leather is most aggressive, and the friction between the two sock layers means the boot rubs the outer sock rather than your skin.
There’s a secondary benefit that most people don’t consider. The extra sock thickness fills the boot more completely, so when the leather presses inward, it’s pressing against a padded surface rather than directly against your heel or instep. Over time, this shapes the break-in point into a more generous fit, which actually makes the boots more comfortable in the long run even when you return to a single pair of socks.
Pair this with blister prevention tape or moleskin on your heels and the back of your ankle. Not as a permanent solution as a bridge. The tape protects your skin during the first few wears while the leather is still unforgiving, and once the leather softens enough to stop being aggressive in those spots, you won’t need it anymore.
Controlled Exposure Over Time
The temptation when you get new boots is to wear them all day on day one. Resist it. An eight-hour day in stiff new leather is a fast track to blisters and an equally fast track to resenting the boots you just spent good money on.
Wear them for short sessions at first. An hour around the house, then off. Then ninety minutes the next day, focusing on walking in a way that flexes the boot through its natural range of motion stepping up onto the balls of your feet, walking down stairs heel-first, changing directions. You’re not exercising; you’re teaching the leather which directions it needs to bend.
After each session, pay attention to where the boot felt tight or where you felt friction. Those are the spots to focus conditioner on before the next wear. You’re essentially spot-treating the problem areas rather than applying a blanket solution and hoping for the best.
Three or four short sessions like this will accomplish more than one brutal all-day wear, with none of the skin damage.
Targeted Heat and the Hairdryer Trick
For particularly stubborn areas a tight toe box, a stiff heel counter, a spot along the instep that won’t yield gentle, targeted heat can accelerate the process without damaging the leather.
Put on your thick socks, lace up the boots, and use a hairdryer on a low to medium setting to warm the specific tight area for thirty to forty-five seconds while the boot is on your foot. Keep the dryer moving so you’re not concentrating heat on one spot. As soon as the leather warms up, flex your foot repeatedly in whatever direction feels restricted. The warmth temporarily makes the fibers more pliable, and flexing them in that state helps set a new shape.
Let the boot cool down while it’s still on your foot. This is the part people miss if you remove the boot while it’s still warm, the leather will cool in its original shape rather than the new one you’ve coaxed it into. The heat loosens the fibers; your foot and the cooling process set them.
One or two rounds of this on a problem area usually makes a noticeable difference. Don’t overdo it excessive heat, especially from a heat gun or any direct flame, will dry out the leather, cause cracking, and undo everything the conditioner accomplished.
When to Call It and Cut Your Losses
Sometimes a pair of boots simply doesn’t fit. A heel that’s too wide for your foot, a toe box that compresses your forefoot regardless of how much conditioning you apply, a last shape that’s fundamentally incompatible with your anatomy no amount of technique overcomes a genuine fit problem.
The honest test: after four or five break-in sessions using the methods above, are the tight areas getting better or just redistributing the pain? Progress should be visible and palpable. The leather should feel noticeably more supple around your heel and instep. If you’re still getting blisters in the same spots after a genuine effort, take them to a cobbler who can use a boot stretcher on the specific areas, or accept that this particular pair isn’t going to work for your feet.
A cobbler with a wooden last stretcher and some stretching spray can expand a toe box or widen the heel cup in ways that conditioning and wear simply cannot achieve. It’s worth the thirty dollars before you write off a hundred-and-fifty-dollar pair of boots.
The goal throughout all of this is a boot that feels like it was made for your foot not a boot that your foot has been forced to accommodate. That’s a subtle but meaningful difference, and it’s the difference between boots you reach for every morning and boots that live in the back of the closet waiting for an occasion that never comes.